Find Your Optimal Indoor Cycling Cadence in One 20–30 Minute Test
Jordan MillsAugust 29, 2026 · 13 min read
Find Your Optimal Indoor Cycling Cadence in One 20–30 Minute Test
Most indoor cyclists ride efficiently somewhere between 80 and 100 rpm, though the honest answer is more specific than that range suggests. A metabolically efficient cadence sits closer to 60 rpm in lab settings, but that pace can’t produce the power most workouts demand. Your real job isn’t chasing a single number. It’s training across a range and measuring what actually works for your body.
TL;DR:
- Riders should focus on training across a range of cadences rather than aiming for a single number, as personal optimal cadence varies with effort and fitness.
- Lab measurements suggest a metabolically efficient cadence around 60 rpm, but most indoor training occurs at 80-100 rpm, which is more practical for power output.
- Pedaling slower increases muscular load, especially on fast-twitch fibers, while faster pedaling shifts workload to the cardiovascular system, requiring a balance based on workout goals.
- Indoor cadence tends to be higher than outdoor due to constant resistance, lack of coasting, and different feel from real terrain, so outdoor pace isn’t a good benchmark.
- Tracking cadence accurately requires direct measurement devices, adjusting for smoothed versus instantaneous readings, and regular data testing to find personal efficiency peaks.
Table of Contents
- What Indoor Cycling Cadence Actually Means
- Why Cadence Changes the Load on Your Muscles and Heart
- Indoor vs. Outdoor Cadence: Why Your RPM Runs Higher on a Trainer
- How to Track Cadence Without Guessing
- Finding Your Personal Optimal Cadence With Real Data
- Drills That Actually Widen Your Cadence Range
- The Mistake That Wastes Most of Your Effort
- A Six to Eight Week Plan to Raise Your Usable Cadence
- How Adaptive Music and Wearables Make Cadence Training Easier
- What I’d Actually Tell a Rider Chasing the “Perfect” Cadence
- Let Your Music Help You Hold the Cadence You’re Training For
- Sources
What Indoor Cycling Cadence Actually Means
Cadence is how many times your pedals complete a full revolution per minute, shown on most bike computers and smart trainers as RPM. It’s the pedaling equivalent of a runner’s stride rate, and just like stride rate, there’s no single correct number that applies to everyone.
Different riders and different efforts call for different bands. Here’s how that typically breaks down:
- Beginner riders: 60–85 rpm, often limited by leg strength and coordination rather than choice
- Experienced riders: 75–95 rpm, reflecting better neuromuscular control
- Typical indoor class guidance: 80–100 rpm, the range most instructors and apps default to
- Sprints and attacks: 100+ rpm, sometimes spiking to 120 rpm for short bursts
- Lab-measured metabolic optimum: around 60 rpm, the cadence that costs the least oxygen per watt produced
Pro Tip: If your cadence display shows wild swings second to second, that’s usually a smoothing setting issue, not your pedaling. Most head units let you switch between instantaneous and averaged cadence. Averaged is easier to hold a target against.
That 60 rpm lab figure surprises a lot of riders, because it’s well below what most indoor classes coach. The gap exists because efficiency and performance aren’t the same goal. Riding at the metabolically cheapest cadence limits how much power you can actually produce, which is why almost nobody races or trains at 60 rpm even though it burns the least oxygen per unit of work.
Why Cadence Changes the Load on Your Muscles and Heart
Pedal slower and you push harder on each stroke. That increases the force your quads and glutes generate per revolution, which taxes muscle fibers, particularly the fast-twitch kind that fatigue quickly. Pedal faster and each stroke gets lighter, but you’re now taking more strokes per minute, which drives up oxygen consumption and shifts the workload toward your cardiovascular system.
This is the fundamental trade-off in cadence selection: force versus frequency, muscle versus lungs.
Optimal cadence doesn’t sit still. It rises as intensity rises, following what researchers describe as a sigmoidal curve, low and steady at easy efforts, climbing sharply as power output approaches your limits.
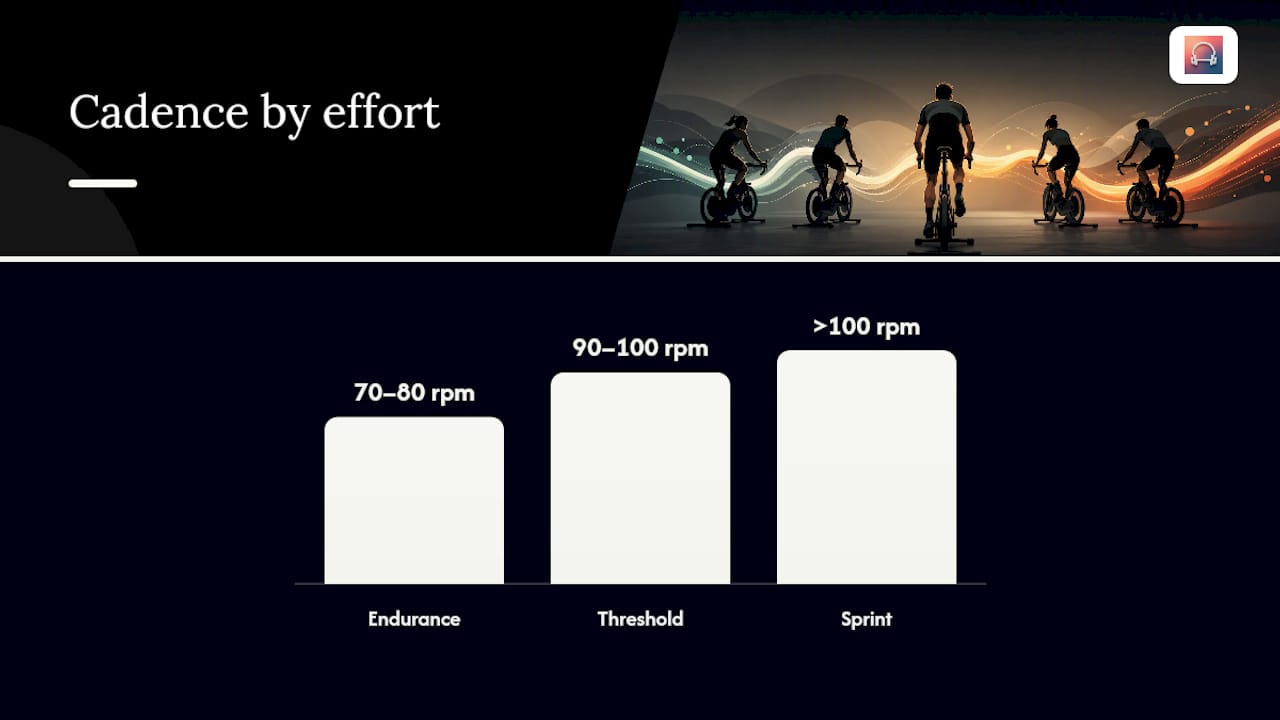
That relationship, documented in cadence research, has real consequences for how you should structure a session. On a long endurance ride, a lower cadence around 70–80 rpm spares glycogen and lets your cardiovascular system coast a bit, useful when you’re trying to survive 90 minutes rather than sprint for 20 seconds. Push into threshold work and cadence naturally climbs toward 90–100 rpm as your body recruits the pattern that lets you sustain higher power without your legs giving out first. Sprint efforts push past 100 rpm because at that intensity, frequency beats force. You need turnover, not grinding.
Pro Tip: If your legs feel cooked before your lungs do, you’re probably riding too low a cadence for the effort. Bump it 5–10 rpm and see if your heart rate responds instead of your quads.
Higher cadences also tend to spare glycogen on longer efforts by shifting more of the work to your cardiovascular system, which matters if you’re riding for endurance rather than short power.
Indoor vs. Outdoor Cadence: Why Your RPM Runs Higher on a Trainer
If you’ve ever compared your indoor average to an outdoor ride, you’ve probably noticed indoor cadence tends to run higher. That’s not your legs getting weaker outside. It’s the environment.
- No coasting indoors. Outdoors you freewheel through corners, descents, and traffic lights. Indoors the resistance is constant, so your legs stay engaged the entire session.
- Steady, predictable workload. A smart trainer or spin bike doesn’t have wind gusts, potholes, or pack dynamics forcing sudden cadence shifts.
- Trainer feel differs from road feel. Flywheel weight and resistance curves on stationary bikes don’t replicate the momentum of a real bike and real terrain, so riders often self-select a faster spin to compensate.
Standing versus seated position changes things too. Standing efforts, common when simulating climbs, naturally drop cadence into the 60–80 rpm range even in an otherwise high-cadence class, which lines up with how fitness studios use digital signage to present cadence cues and visual pacing compared to flat-road segments run at 80–110 rpm.
Don’t stack your indoor average against an outdoor ride and assume something’s wrong. They’re measuring different demands.
How to Track Cadence Without Guessing
Getting a clean cadence number depends on your setup. Here’s how the common options stack up:
- Smart trainers (Wahoo KICKR, Tacx Neo, and similar) measure cadence directly through the drivetrain and tend to be the most consistent option for indoor sessions.
- Dedicated cadence sensors, magnet-based or accelerometer-based, clip onto your crank arm and pair with any head unit or app over ANT+ or Bluetooth.
- Bike head units (Garmin, Wahoo ELEMNT) display cadence alongside power and heart rate, letting you watch all three at once.
- Wearables like Apple Watch or Fitbit estimate cadence less precisely on a stationary bike than a dedicated sensor, since they’re reading motion rather than crank rotation.
One setting worth checking before you rely on any of these: whether your display is showing instantaneous cadence or a smoothed 3 to 5 second average. Instantaneous readings jump around and make it hard to hold a target; smoothed averages are far easier to train against. Logging cadence alongside power and heart rate, rather than cadence alone, gives you the full picture. Cadence tells you how fast you’re spinning; power tells you how hard; heart rate tells you what it’s costing you.
Finding Your Personal Optimal Cadence With Real Data
Generic ranges get you close. Field data gets you exact. A field-method study on road cyclists tracked power, heart rate, and cadence across many sessions per rider, then used non-linear modeling to find where each individual’s power output peaked relative to their physiological cost. The optimal cadences it identified weren’t universal. One rider peaked around 83 rpm, another around 70 rpm, and riding 20 rpm off that personal optimum cost riders roughly 5 to 8% of their power output.
That’s a meaningful loss for something as simple as spinning a bit too fast or too slow.
You don’t need six months of structured data collection to get useful signal, though the original study did use extended field data for its strongest conclusions. A simplified version works for most indoor cyclists:
- Ride the same workout structure at three or four different cadence bands (say, 70, 80, 90, and 100 rpm) at matched power
- Hold each band for at least 4 to 5 minutes to let heart rate stabilize, since HR lags behind effort changes
- Log cadence, power, and heart rate for every interval, ideally across several sessions rather than one
- Compare which cadence produced the lowest heart rate for the same power output, or the highest sustainable power at a matched heart rate
Repeat this test every few months. Fitness changes shift your optimal cadence, so a number that fit you in January might not fit you by summer. The cadence and heart rate relationship is worth understanding in more depth if you want to interpret these sessions correctly rather than just collecting numbers.
Drills That Actually Widen Your Cadence Range
Improving cadence isn’t about picking a target and willing your legs to hit it. It’s neuromuscular training, and it responds to specific drills the same way strength responds to specific lifts.
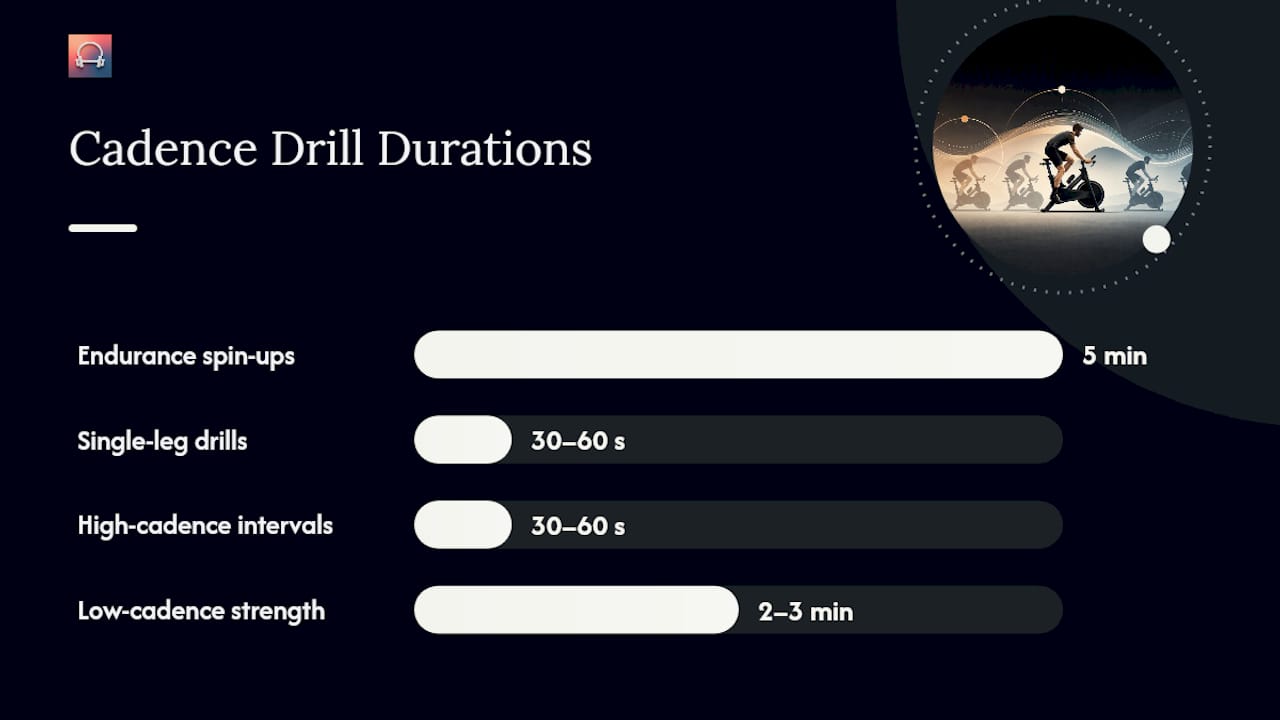
- Endurance spin-ups. During a steady ride, raise cadence 3 to 5 rpm above your normal pace and hold it for 5 minutes without letting power drop. Repeat 2 to 3 times per session, gradually raising your baseline over several weeks.
- Single-leg drills. Pedal with one leg for 30 to 60 seconds while the other rests on a support (or just goes slack on the pedal), then switch. This exposes the dead spots in your stroke, usually right at the top and bottom of the revolution, and forces smoother force application through the full circle.
- High-cadence short intervals. Push to 100 to 110 rpm for 30 to 60 seconds at controlled, moderate resistance. The goal is turnover without bouncing, not maximum power.
- Low-cadence strength intervals. Drop to 50 to 60 rpm at higher resistance for 2 to 3 minutes. This builds the raw force production that supports cadence work at the other end of the spectrum.
Pro Tip: Balance high and low-cadence work across the week rather than stacking them back to back. Two cadence-focused sessions with a day of normal riding between them beats trying to improve both ends of your range in the same 45 minutes.
These drills, widely used across coaching resources, work because they target the specific limitation, whether that’s coordination at high RPM or force production at low RPM. Full drill breakdowns with exact durations are worth bookmarking for your training log.
The Mistake That Wastes Most of Your Effort
Bouncing in the saddle is the single most common cadence problem in indoor cycling, and it has one cause almost every time: too little resistance. When the flywheel offers no real load, your legs can’t control the pedal stroke through the bottom of the circle, so you bounce instead of pedal.
The fix is simple. Add resistance until you can hold a smooth, controlled circle at your target cadence, then hold that resistance steady.
A few other quick self-checks worth running mid-session:
- If you can’t maintain a cadence without bouncing, that’s a resistance problem, not a fitness problem
- Forcing cadence higher than your control allows drops power output rather than raising it, so speed for its own sake backfires
- Compare your power output at a given cadence session to session. A drop at the same RPM signals fatigue or a form breakdown worth addressing
Instructor-led classes lean on cues like “add resistance until the pedal stroke feels like a smooth circle,” a quick, reliable way to correct almost any bouncing problem without overthinking it.
A Six to Eight Week Plan to Raise Your Usable Cadence
Three sessions cover most of what you need, repeated and progressed over six to eight weeks:
- Base cadence session (45 to 60 minutes): steady riding at 80 to 90 rpm, with 3 spin-up efforts of 5 minutes each raising cadence 5 rpm above baseline.
- Threshold cadence intervals (40 minutes): 4 to 6 intervals of 4 minutes at 90 to 100 rpm, holding threshold power, with 2 minutes easy recovery at 70 rpm between.
- Speed repeats (30 minutes): 6 to 8 repeats of 30 to 45 seconds at 105 to 115 rpm, controlled resistance, full recovery between efforts.
A workable weekly structure runs two cadence-focused sessions plus one or two maintenance rides at whatever cadence feels natural. Track average cadence per session, time spent in your target band, and how heart rate responds at matched power. When your average cadence in the base session climbs 5 rpm without a corresponding heart rate spike, you’re ready to shift your target band upward. Sample interval structures matched to music tempo are laid out in more detail here if you want ready-made session templates.
How Adaptive Music and Wearables Make Cadence Training Easier
Holding a target cadence for 5 minutes sounds simple until you’re 20 minutes into a session and your attention drifts. This is where tempo-matched music earns its place in a cadence routine. Music with a beat that locks to your target RPM gives your legs a rhythm to follow without you consciously counting pedal strokes.
Repbeats builds on this by adjusting BPM automatically as your cadence, heart rate, or session intensity shifts, using live data from wearables like Apple Watch and Fitbit rather than a fixed playlist. That kind of real-time feedback loop helps you hold a spin-up drill or a high-cadence interval without staring at a display the entire time. If you already train with a wearable, pairing that data to your music turns a generic playlist into a pacing tool.
What I’d Actually Tell a Rider Chasing the “Perfect” Cadence
Stop looking for one number. The research is consistent on this point: preferred cadence shifts with muscle-fiber composition, fitness, and intensity, which means the rider next to you in class might have a genuinely different optimal RPM even at identical power output. Training your range, low-cadence strength work and high-cadence turnover, matters more than nailing any single figure.
If you take one thing from this article and do it this week, make it this: pick one 20 to 30 minute session, ride three cadence bands at matched power, and log cadence alongside heart rate. That single test will tell you more about your body than any generic chart.
— Jordan Mills
Let Your Music Help You Hold the Cadence You’re Training For
Repbeats gives you a pacing tool the drills above can’t: music that adjusts its BPM automatically as your cadence or heart rate changes, so you’re not splitting attention between a display and your legs.
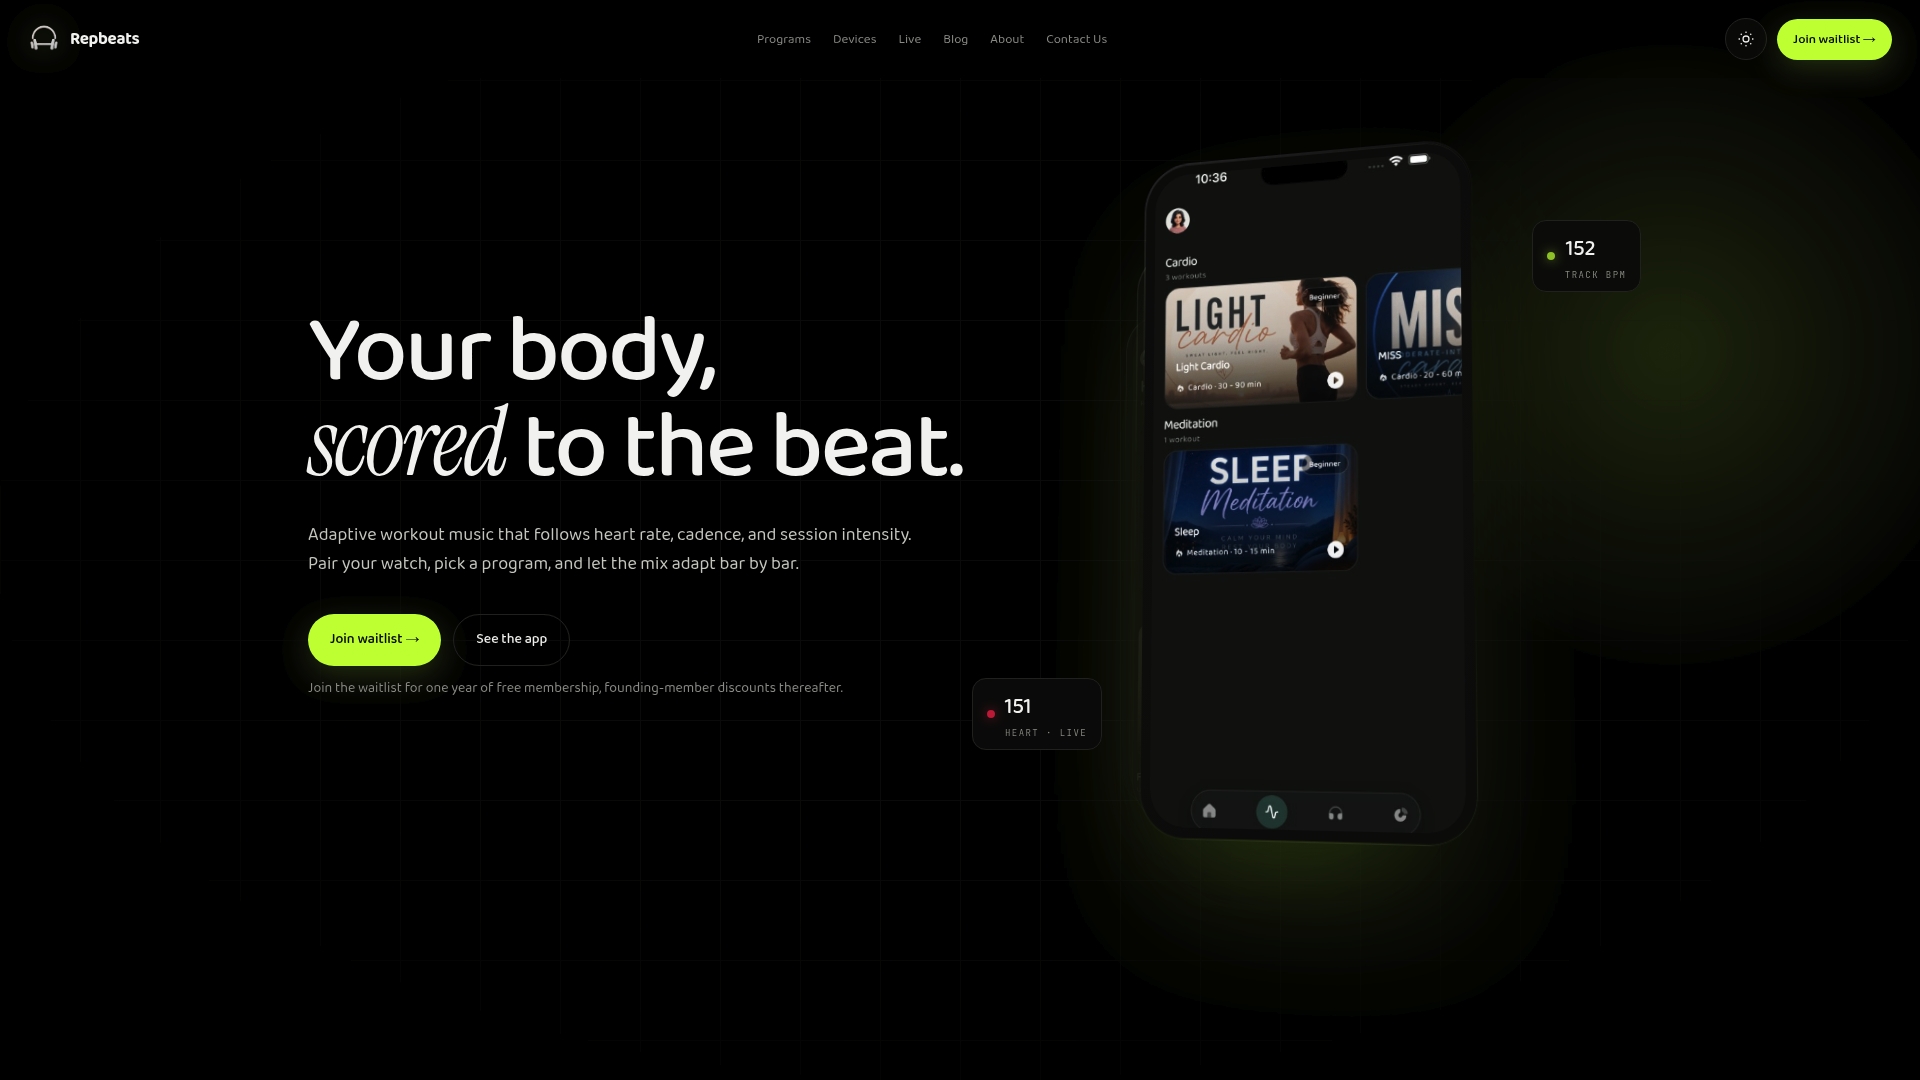
It’s built for riders who already train with a wearable, since the app pulls live data from devices like Apple Watch and Fitbit to keep the tempo locked to what your body is actually doing, not a static playlist you picked before the ride started. If you’re working through spin-ups, threshold intervals, or speed repeats from the plan above, a tempo that rises and falls with your target RPM makes it easier to hold the band without constantly checking your numbers. Check out Repbeats and set up your first adaptive session around whichever cadence drill you’re testing this week.
Sources
- Frontiers in Physiology (2024)
- Determining optimal cadence for an individual road cyclist from field data (PMC)
- TrainerRoad blog
- Bicycling: Cycling cadence — how to find and train yours (2026)